Round netting for string bags, hair nets, dip nets, etc.
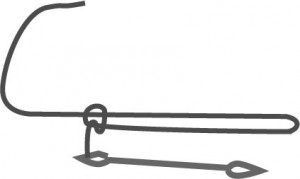
Make a slipknot with a long loop. Be sure the shuttle end of your string goes to the tied part of the knot and the loose end of the string goes to the slip part of the knot. be sure to leave a tail that is at least twice the radius (distance from the center to the edge of your finished piece) in length. The loop of the slip knot will be your foundation.
Net your first row around the loop of the slip knot. I prefer to start with an odd number of loops (and at least 7) since finishing the row will add one more loop, and even numbers are easiest to expand from.
Bring the loose end of the slip knot down through the loop of the slip knot at the far end of your stitches.
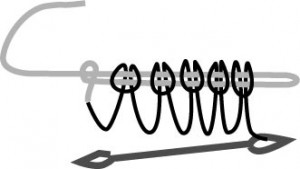
 Gently pull the loose end and tighten the loop
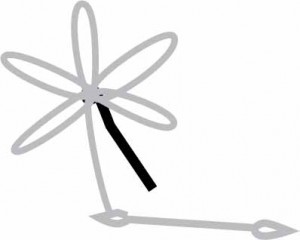
Keep tightening and pulling until the slipknot has tightened all the way and your starting loops are gathered in the center.
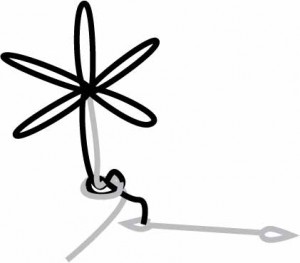
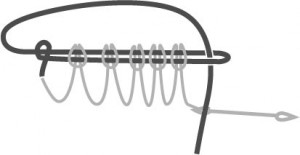
Tie the tail end of the slip knot and the shuttle end of your working thread together in an overhand knot (over your mesh stick to keep the same loop size) to make the last loop in your circle.
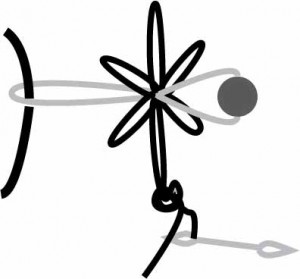 At this point it is useful to thread a large bead (wood is good) on a separate loop of string, thread that string through the center of your netting and attach it to whatever stationary point you’re using for tension. The bead will keep the string loop from passing through your net and provide tension without damaging the work.
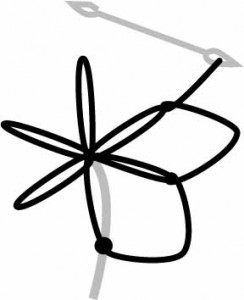 Now, net around the circle.
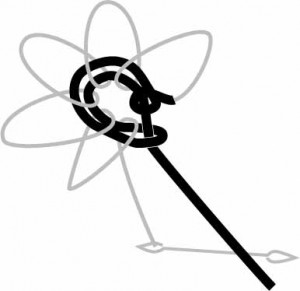
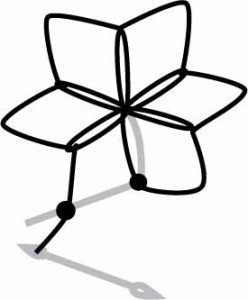 Tie off the last loop with the tail from the slip knot again.
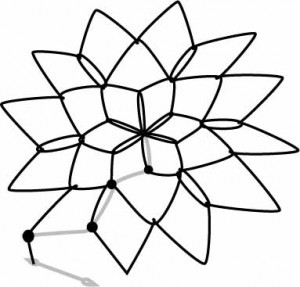 As you net more rows you will regularly need to add increase stitches to keep up with the expanding size of the circle. Try to make sure that increase stitches are spaced evenly around the circle to keep your net flat, neat and even. How soon you will need to start adding the increase stitches, as well as how often and how many, will be determined by a number of factors like how many loops you started with and mesh size. You’ll eventually get a feel for it, but if your netting is starting to feel stretched, it’s probably time to add a row with increases.